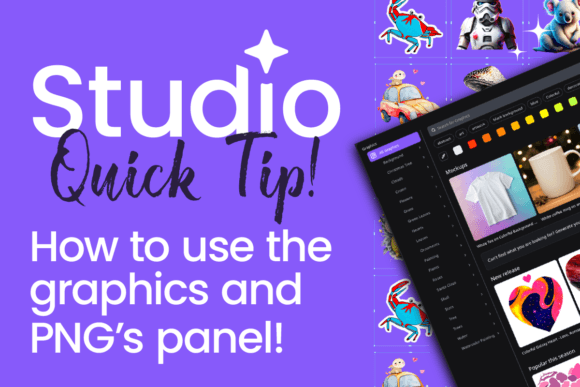
Mastering Graphic Elements in Studio: A Designer's Guide
Let's be honest, a blank canvas is both exciting and terrifying. You have a vision, but getting from point A to a polished, professional design can feel like a massive leap. This is where understanding How to Use the Graphics Elements in Studio becomes less of a technical skill and more of a creative superpower. It’s about moving beyond basic shapes and text to inject personality, structure, and visual storytelling directly into your work. Think of these elements not as mere decorations, but as the foundational building blocks that give your designs rhythm and flow.
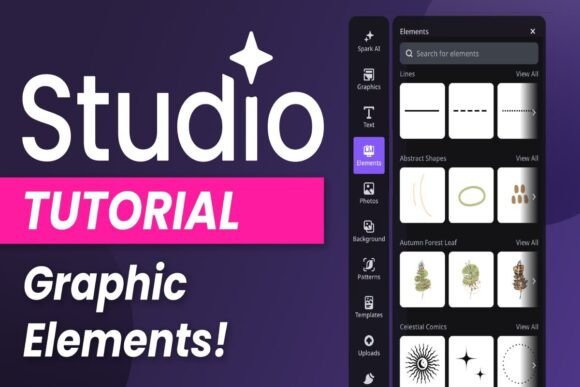
What Exactly Are These Graphic Elements?
When we talk about the Elements feature in Studio, we're referring to a curated library of vector-based assets. These aren't static images; they're flexible, scalable, and often customizable components. You’ll find everything from simple geometric shapes and elegant line art to intricate floral arrangements, abstract blobs, and functional icons. Their visual personality ranges from minimalist and clean to bold and illustrative, fitting seamlessly into modern typography trends. The overall appeal lies in their consistency and quality—they’re designed to work together, which instantly elevates the professionalism of any project.
The real value of learning How to Use the Graphics Elements in Studio is the efficiency it brings. Instead of hunting for separate design assets or struggling to create complex vectors from scratch, you have a toolbox at your fingertips. This allows you to focus on composition and message rather than getting bogged down in technical execution. For a small business owner creating social media graphics, a blogger designing a header image, or a crafter assembling a printable, this feature streamlines the creative process dramatically.
Where Do These Elements Shine? Real-World Applications
The versatility of these graphic elements is what makes them indispensable across so many mediums. Their application isn't limited to one type of project. Let's break down where they truly excel:
- Brand Identity & Logo Design: Use geometric elements to construct unique, scalable logos. A collection of consistent line icons can form the basis of a cohesive brand icon set for a startup or small business.
- Editorial & Packaging Design: In magazines, brochures, or product packaging, decorative frames, dividers, and thematic illustrations can guide the reader's eye and add a layer of tactile sophistication. A well-placed botanical element can transform a simple label into an artisanal product.
- Web & Digital Design: For web design, these elements are perfect for creating custom section dividers, background patterns, or animated icons that enhance user experience without slowing down the site. They’re also key to creating standout social media graphics that stop the scroll.
- Personal & Commercial Projects: From wedding invitations and greeting cards to T-shirt designs and planner stickers, the creative font possibilities are endless. Hobbyists and crafters can use them to add professional flair to DIY projects.
The key is to match the element's style to your project's tone. A sleek, sans-serif icon set works for a tech startup's website, while a hand-drawn script font flourishes might better suit a boutique bakery's menu. This alignment strengthens brand perception and ensures consistency across all touchpoints.
A Practical Walkthrough: From Selection to Composition
Let's get into the practical steps. Mastering How to Use the Graphics Elements in Studio involves a thoughtful workflow that goes beyond simple drag-and-drop.
- Define Your Goal First: Before you even open the Elements panel, ask: What is the purpose of this design? Is it to inform, persuade, or delight? The answer will guide your selection. A financial report needs clean, structured shapes for data visualization, while a children's party invitation calls for playful, colorful illustrations.
- Evaluate Project Fit & Style: Browse the library with your goal in mind. Look for elements that share a similar visual hierarchy and style. Mixing a ultra-modern 3D element with a rustic, handwritten font can create discord unless done very intentionally. Pay attention to stroke weights, color palettes, and overall complexity.
- Master Font Pairing (With Elements): This is crucial. Your graphic elements should complement your typography, not compete with it. If you're using a bold, display font for a headline, pair it with simpler, more subtle graphic accents. Conversely, a minimalist sans serif font body text can be beautifully framed by more detailed illustrative elements. Always test pairings in context.
- Customize for Cohesion: Don't just accept the default. Change colors to match your brand palette. Adjust sizes and opacity. Combine multiple simple elements to create a new, more complex composition. This customization is what transforms generic assets into a unique part of your design assets toolkit.
- Review for Readability & Licensing: Always step back and check. Do the elements enhance or obscure your message? Ensure text remains legible. Furthermore, if you're using these for a commercial project—like a client's logo design or product packaging—verify the licensing terms. Most premium font and element libraries offer clear commercial use licenses, but it's your responsibility to confirm.
By following this process, you move from simply using elements to strategically integrating them. You begin to see how a single creative font pairing with a set of complementary icons can define an entire campaign's look. You understand that a well-chosen serif font paired with delicate line art evokes tradition and elegance, while a modern typography stack with bold geometric shapes feels innovative and dynamic.
Ultimately, the goal of learning How to Use the Graphics Elements in Studio is to make your design process more intuitive and your results more impactful. It’s about building a visual vocabulary that allows you to articulate ideas more clearly and beautifully. Start by experimenting with one project—a social media post, a blog graphic, or a simple flyer. Observe how these assets influence audience engagement and give your work a more polished, professional edge. The more you practice, the more you'll develop an instinct for which elements will best serve your creative vision, turning every blank canvas into an opportunity for effortless design.